


🔧 Fix it like a pro—your camera deserves the best!
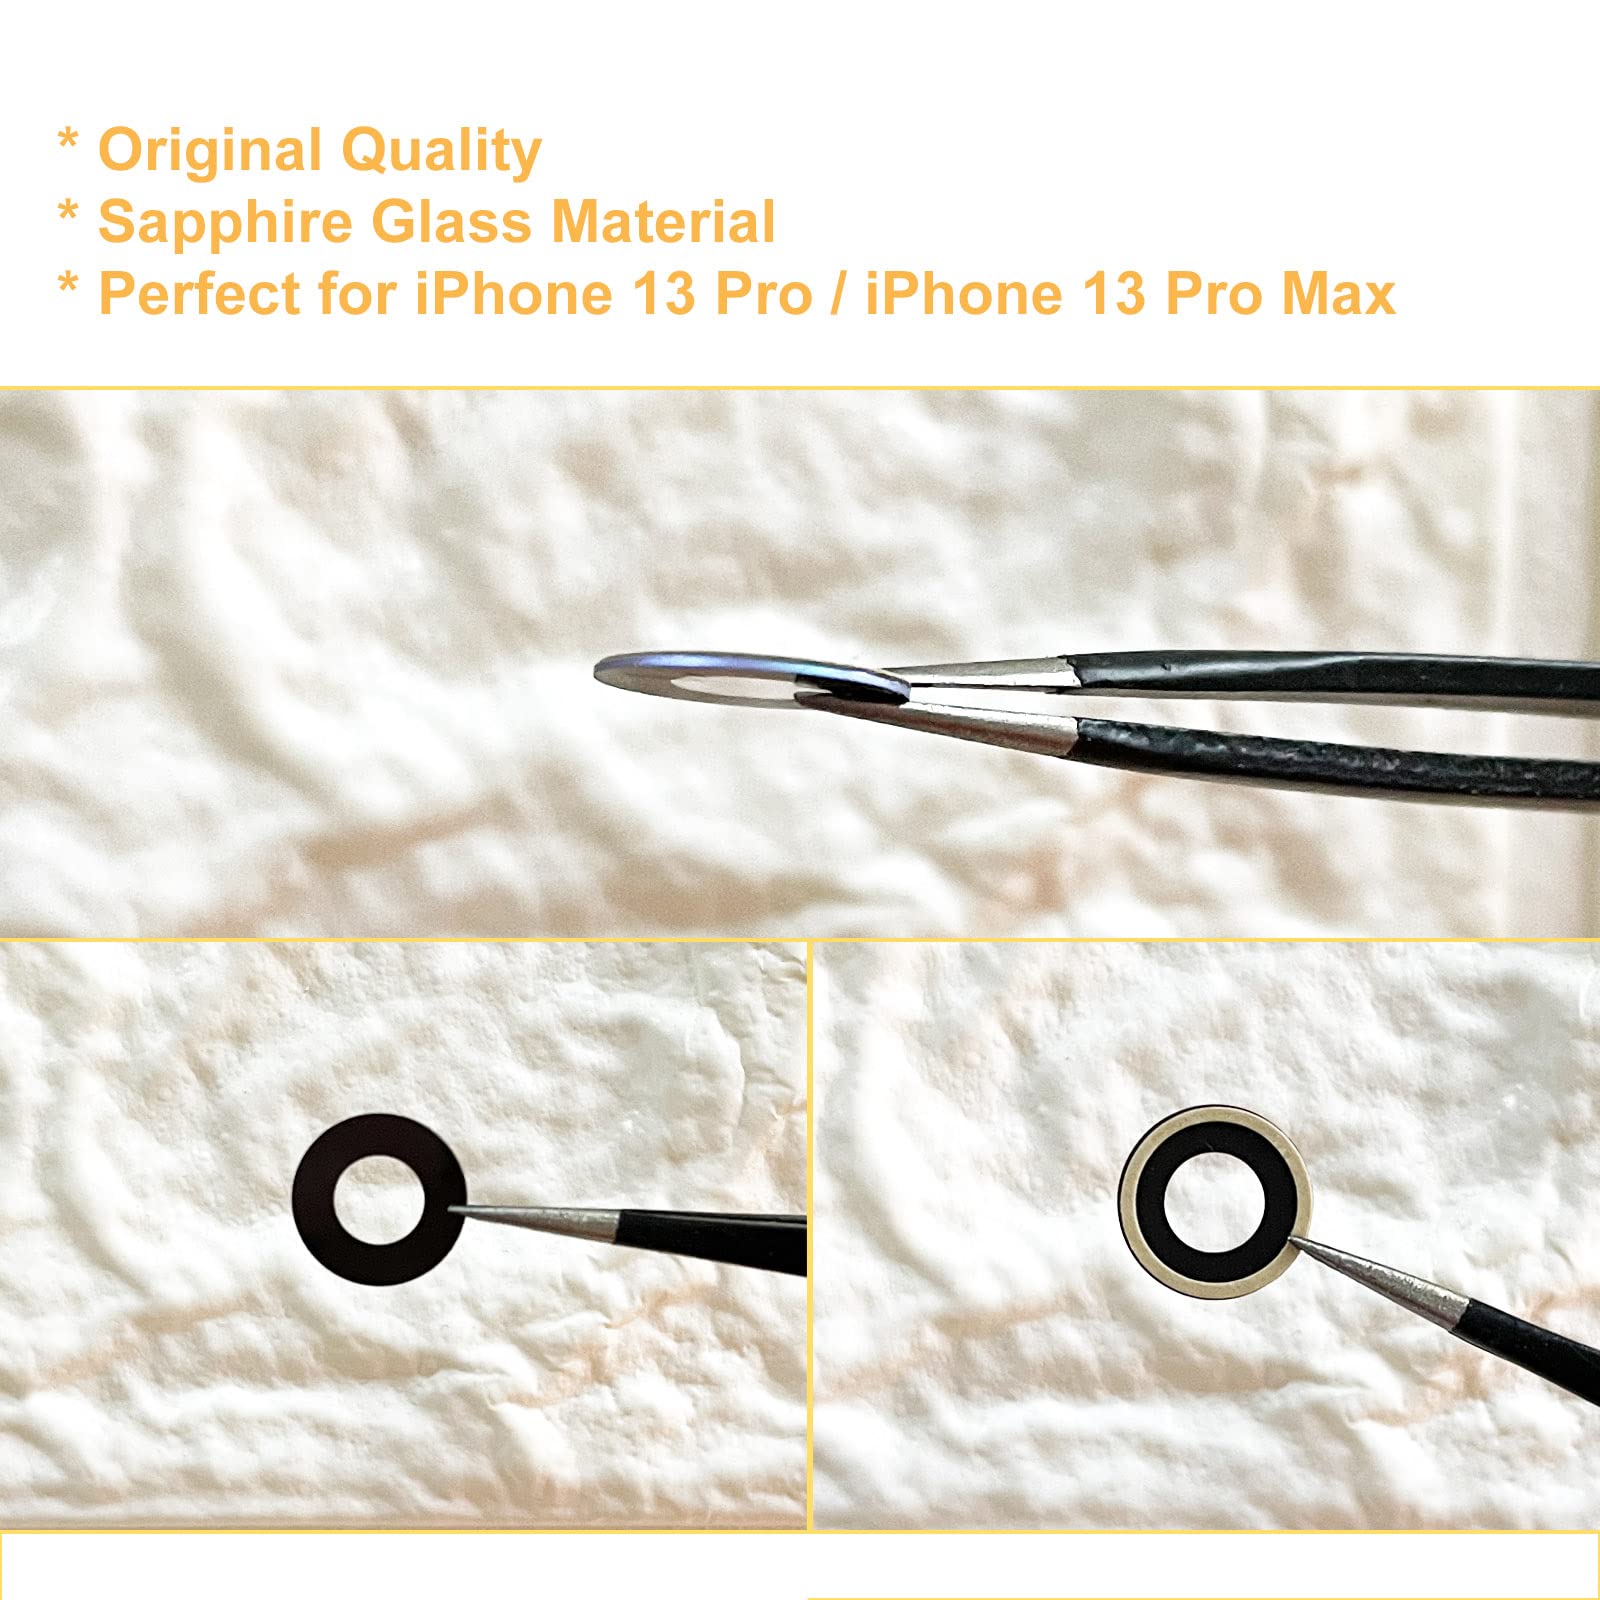
The Original Back Rear Camera Glass Lens Replacement for iPhone 13 Pro and Pro Max is crafted from 100% real sapphire glass, ensuring durability and clarity. This replacement kit includes preinstalled adhesive and a precision tool kit, making it easy to restore your device's camera functionality. Compatible exclusively with iPhone 13 Pro and Pro Max, it comes with a one-year warranty for added assurance.
| Package Dimensions L x W x H | 19.2 x 6.7 x 1.7 centimetres |
| Package Weight | 0.03 Kilograms |
| Product Dimensions L x W x H | 15 x 10 x 0.5 centimetres |
| Item Weight | 30 Grams |
| Brand | Cemobile |
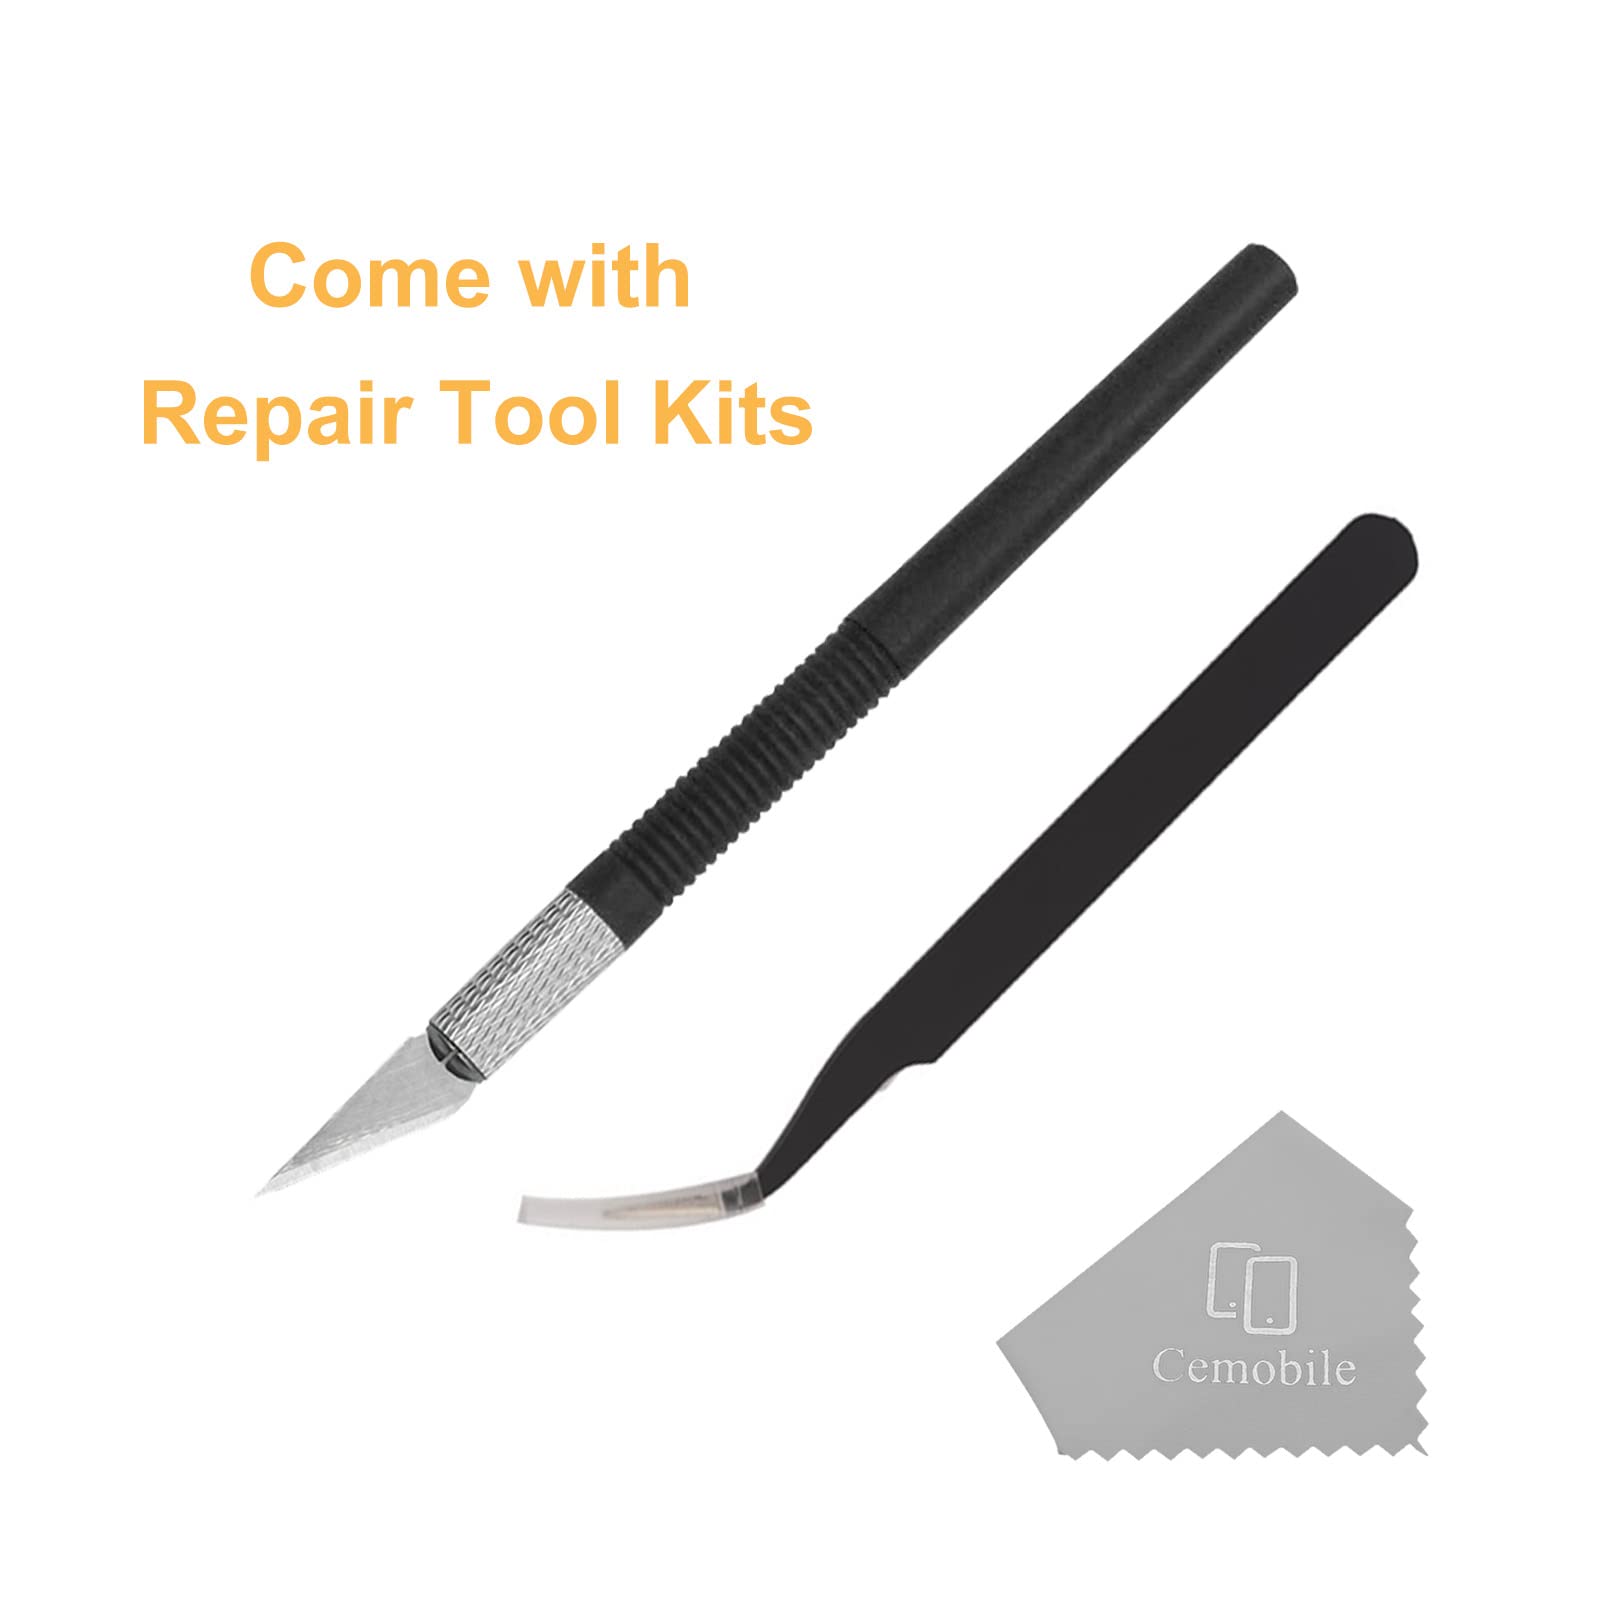
| Camera Lens | 100% Real Original Sapphire Glass Camera Lens Replacement, used to replace the damaged/broken/scratched camera glass lens cover, compatible with iPhone 13 Pro / Max, comes Preinstalled adhesive, Anti-Static Tweezers, Precision Knife Repair Tool Kit, and a Cleaning Cloth. Guide is not included, but multiple repair guide videos are available on YouTube. |
| Included components | repair tool kit |
| Min Focal Length | 28 Millimetres |
| Part number | CEMBAMZPTN315 |
| Warranty description | 1 year warranty |
| Lens Design | Prime |
| Focus type | Fixed Focus |
| Guaranteed software updates until | unknown |
A**Y
Great. Just a few tips
The product is great. It does a good job and it looks like the lens comes with oleophobic coating.Few things to remember,The lens might look small, but trust me it fits. Just make sure you do not touch the inside of the lens after peeling off the adhesive cover.And once fixed, apply slight pressure and use a hairdryer to heat and apply pressure again and repeat the cycle For at least 20 minutes.Doing this make sure there is a water seal and your phone is water resistant back again.
D**L
Beginner-friendly, easy installation with included tools. Skip overpriced phone technicians!
I cracked my rear camera lens a few months ago and I decided to buy this replacement and install it myself. First impression was that it does look kind of smaller than my actual camera is but thats not true. It fits perfectly! Also it was nice that they included the tools to install it, and it was pretty easy to installation too! Just clean and dust it properly before installing, cus you wouldnt want to install with a piece of dust inside. Recommended to my friend who never did phone repairs before and he managed to do it without any hassle at all too. Definitely better deal buying this and installing it yourself compared paying a phone technican who will charge 5-7 times more.
M**A
Amazingggggg
Fixed my iPhone 13 Pro Max camera! It didn’t take long just needed patience, time and a YouTube video!
M**L
It’s looks like wrong size, but..
Initially, I also thought it was the wrong size, as it looked too small to fit a 13-pro lens (when I placed the covers on top of the phone cameras), but I decided to give it a chance and see how it went. In order to remove the broken cover, heaters didn’t help a lot, so I looked at YouTube to see how people were handling it and learned that you needed to crash the lens cover completely to replace it.BE VERY CAREFUL not to touch or scratch your lens that is below the cover!I used my own knife, as with the one provided I couldn’t further break my already broken cover. Then clean everything, especially old glue. I used a hairdryer and provided tweezers to do so. Take off the paper cover of the new cover. Try to touch it mostly with tweezers, not to leave any fingerprints. As well, check with proper lighting that you don’t have any dust under the new cover. If needed, remove with a cloth.The only reason I put 4 stars was because of a small scratch on the new cover that is not affecting pictures but is visible to me (see last pic).All processes take 10 minutes, with photo shoots in between.
K**N
Saved me £300+
Broken camera lense. Got stupid quotes and this has done the job and more. Amazing bit of a kit, you get. Cleaning cloth, scalpel and fine tooth tweezers. The lens is packaged very well and if you pick it up using the gel sheet it’s attached too and tweezers no finger marks. I didn’t heat the glue up just took my time removing the lens and it’s worked wonders!
A**Y
Faulty lens
Great kit and everything you need, mr only issue is the lens I changed had glue already on it so having to order new set again.
S**A
No instructions and cleaning kit
This item has no instructions whatsoever. It comes with 3 different lenses with no instructions which one to use where. Also no cleaning kit like alcohol wipes etc included which is a basic requirement
F**C
Good and simple to use kit
No instructions were provided so I’ll try break down what you need to do. But you’ll find loads of YouTube videos with visual demonstrations too.Firstly you want to heat the lens you are trying to replace, I used a hairdryer and heated it for a long time to really break down the glue. Phone becomes incredibly hot to the touch when you’re at the right sort of temperature.Then use the tweezers and razor provided to pick apart the damaged lens and take away the glass shards, the razor can be used to dig under the lens and release the glass. Be gentle and try not to damage camera lens.Once all is removed flip the phone and tap out any lose shards of glass then use rubbing alcohol and the cloth to clean up where new lens protector is going.Finally remove lens from packaging and find the respective lens you need, remove plastic protecting and the paper seal on top of the glue then place over iPhone lens and press down.
Trustpilot
1 day ago
1 week ago

![4youquality [3-Pack Camera Lens Protector for iPhone 13 Pro Max (6.7inch) & iPhone 13 Pro (6.1inch), 9H Tempered Glass, [LifetimeSupport][Anti-Scratch][Does Not Affect Night Shots]](https://images-eu.ssl-images-amazon.com/images/I/710QiO90HML._AC_UL116_SR116,116_.jpg)
![4youquality [4-Pack Screen Protector for iPhone 16e, iPhone 14, iPhone 13 & 13 Pro (6.1-Inch), Tempered Glass Film, [Impact-Protection][Anti-Shatter][Anti-Scratch]](https://images-eu.ssl-images-amazon.com/images/I/71vWxjISN2L._AC_UL116_SR116,116_.jpg)